Do you want to host multiple websites on a single Namecheap hosting package without buying separate hosting plans? In this guide, I’ll walk you through the exact steps to add and install WordPress on a new domain using an existing Namecheap hosting account.
This method works especially well if you’re using Namecheap’s Stellar Plus or Stellar Business plans, which allow unlimited website hosting.
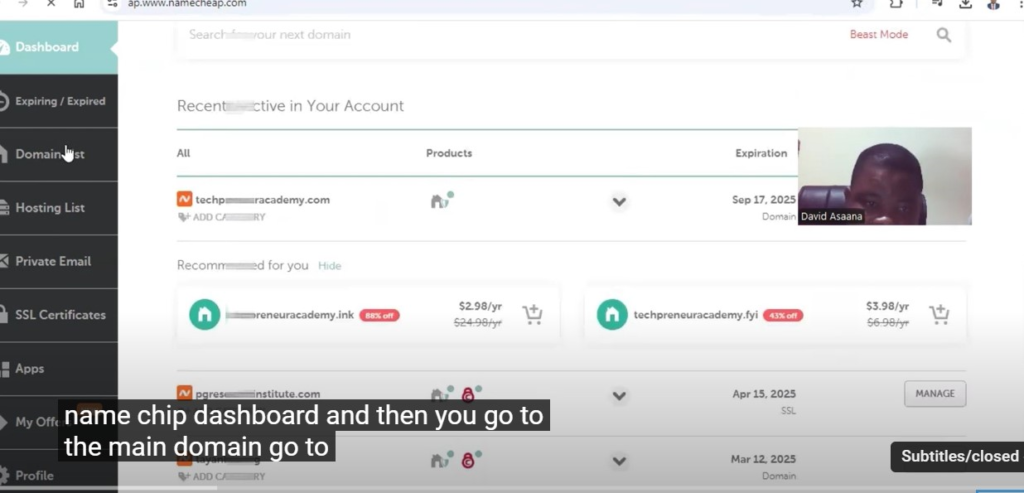
Step 1: Log into Your Namecheap Dashboard
Identify your primary domain – the one associated with your hosting package.
Visit namecheap.com and log into your account.
Navigate to the Domain List on the left-hand panel.
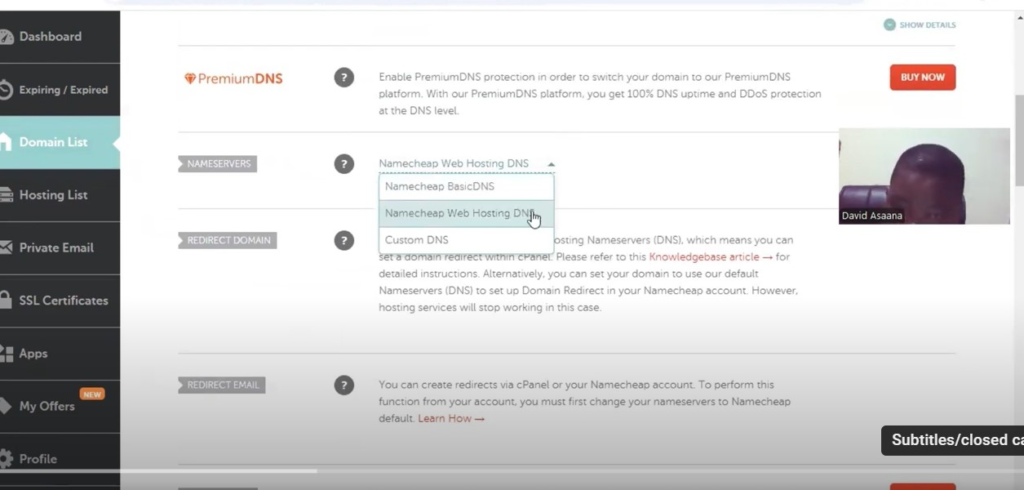
Step 2: Update Name Servers
- Click Manage next to your primary domain.
- Scroll down to the Nameservers section.
- Change it from “Namecheap BasicDNS” to “Namecheap Web Hosting DNS.”
- Click the blue checkmark to save changes.
⚠️ This step is crucial. Without updating the nameservers, you won’t be able to host multiple websites under the same package.
Step 3: Go to Your Hosting Dashboard
Then, select Go to cPanel.
From the left menu, click Products.
Under your hosting package, click Manage.
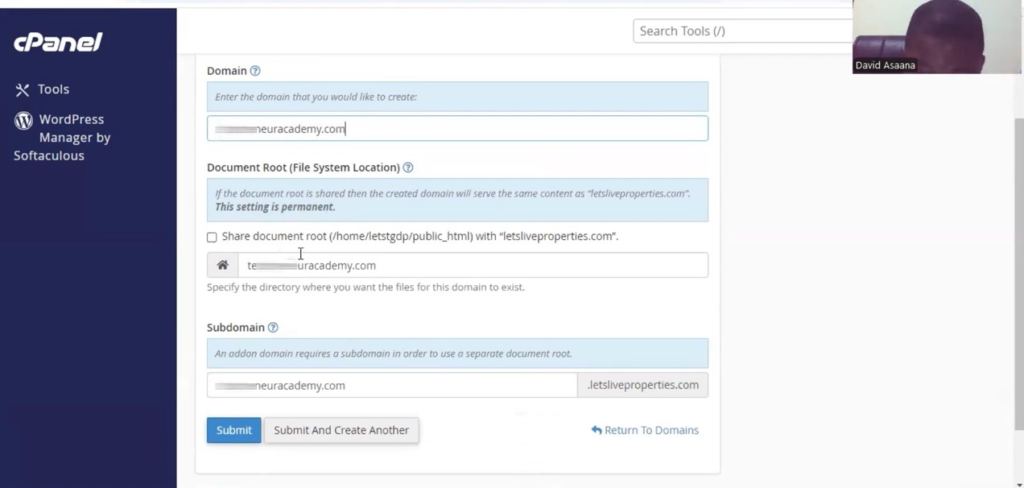
Step 4: Add Your New Domain
- In cPanel, scroll down and click Domains.
- Click Create a New Domain.
- Enter your new domain name.
- Uncheck the option that says “Share document root with primary domain.”
- Click Submit.
Your new domain is now linked to the hosting plan
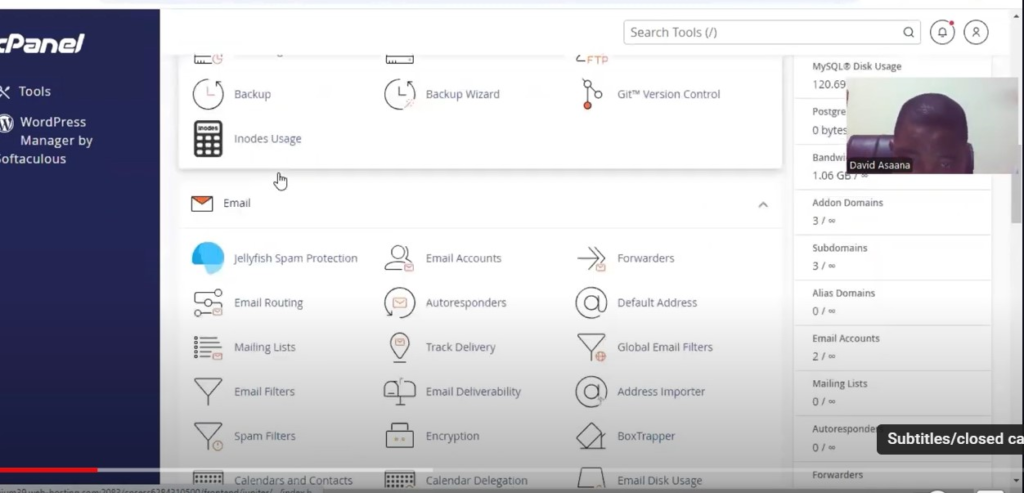
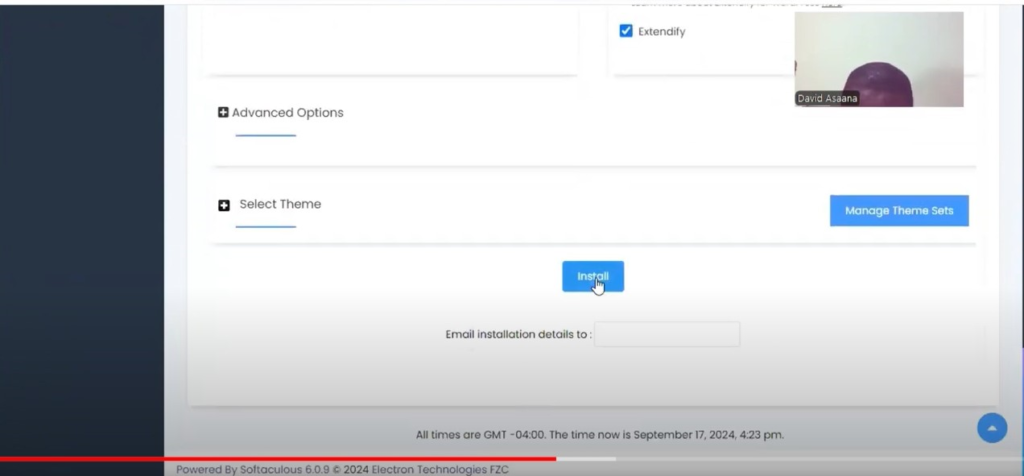
Step 5: Install WordPress on the New Domain
- Go back to the cPanel homepage.
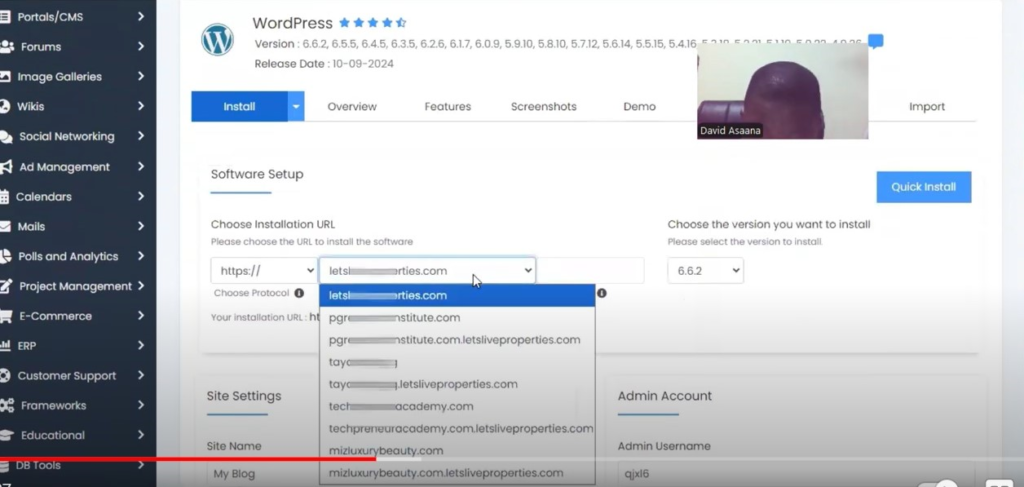
- Scroll to the Softaculous Apps Installer section and click WordPress.
- Click Install.
- From the drop-down, select your new domain.
- Enter your:
- Site name and description
(Example: “Empowering you to take control of your financial future”) - Admin username and password
- Admin email (you can use Gmail if you haven’t set up a domain email yet)
- Site name and description
- Choose your language and any plugins if needed.
- Click Install.
Step 6: Wait for DNS Propagation
At this stage, your site might not be immediately reachable. That’s normal.
- DNS changes (like nameservers) may take up to 30 minutes or even 24 hours to fully propagate.
- If your site doesn’t load right away, be patient. Come back later and try again.
Step 7: Log in to WordPress Admin
Once your domain is active:
- Go to
yourdomain.com/wp-admin - Enter the admin credentials you set during installation.
- You’ll now be inside your WordPress dashboard, ready to start building your website.
Bonus Troubleshooting Tip
If you’re still unable to access your site:
- Go back to Namecheap > Domain List > Your New Domain > Manage > Nameservers
- Make sure it’s also set to Namecheap Web Hosting DNS
- Changes can take 30+ minutes to reflect. If problems persist, use Namecheap’s Live Chat support for quick help.
If you need more help, reach out to us directly through WhatsApp or Telegram or book a Zoom meeting with us via our website. Don’t forget to check out the video tutorial for a more hands-on guide.
Found this article helpful? Share it with others who may need to host multiple website on one name-cheap too! For more website and business management tips, subscribe to our newsletter or follow us on social media.