Follow these steps to change your Facebook Page name:
Open the Facebook App: Launch the Facebook app on your mobile device.
Access Your Pages: Tap on your profile picture at the top right corner. Then, tap on the small arrow below the “+” icon to view all your Pages.
Select the Desired Page: Choose the Page you wish to rename.
Navigate to Settings: Once on your Page, tap your profile picture again at the top right corner. Scroll down and select Settings & Privacy, then tap on Settings.
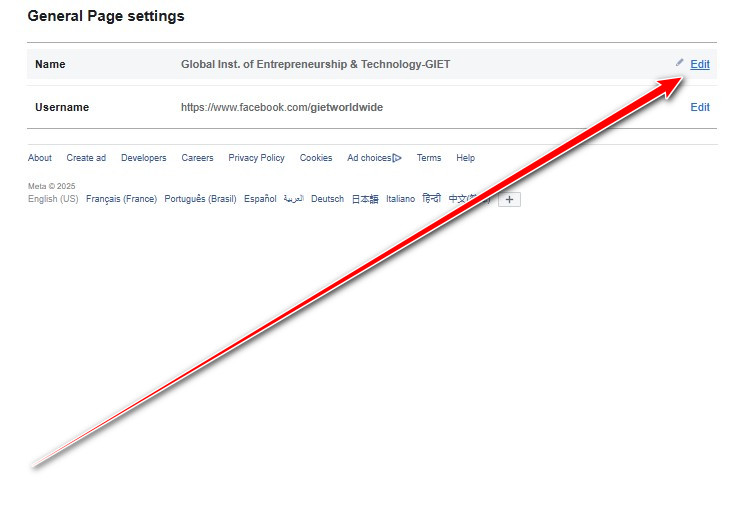
Access Page Setup: Scroll down to find Page Setup and tap on it.
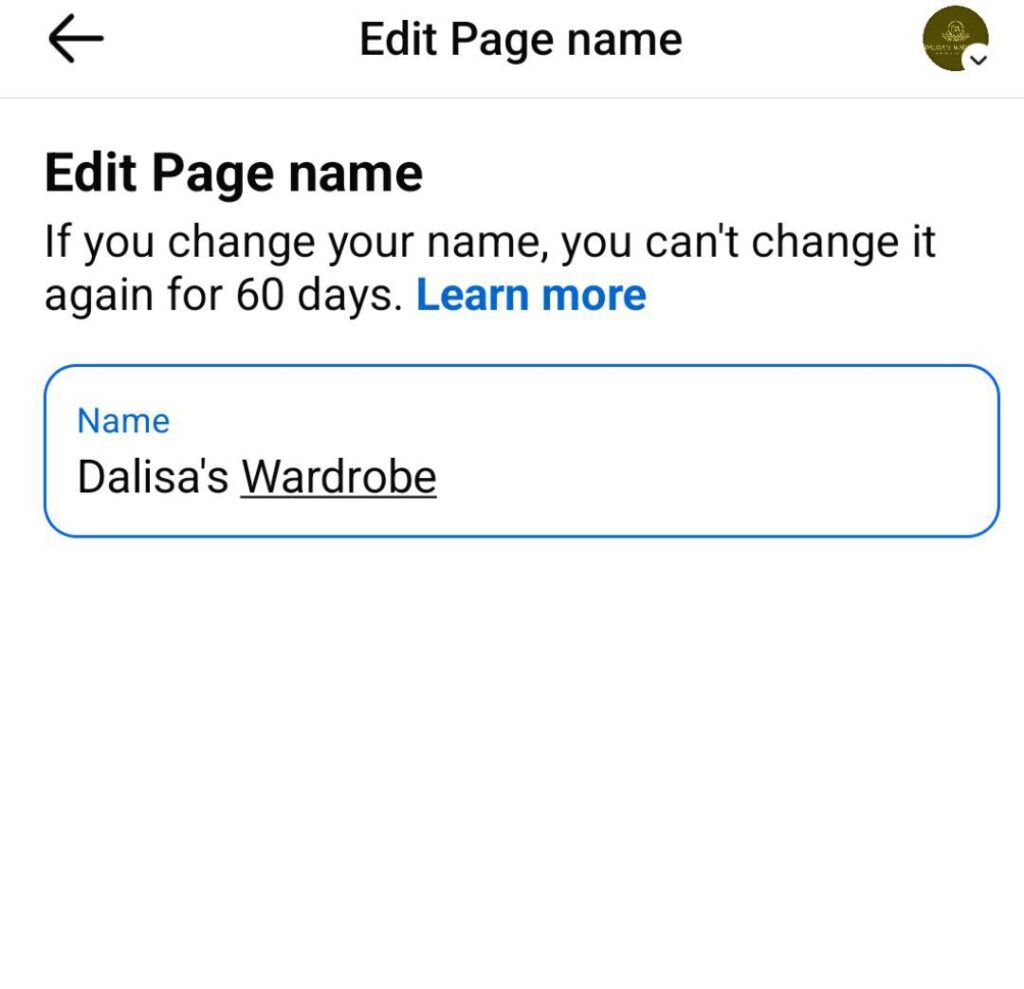
Edit Page Name: Within the Page Setup, tap on Name. If you haven’t changed your Page name in the last 60 days, you’ll be able to edit it here.
Submit the Change: After entering the new name, tap on Review Change, confirm your decision, and submit. Facebook will process your request, and the name change should take effect shortly.
If you need more help, reach out to us directly through WhatsApp or Telegram or book a Zoom meeting with us via our website. Don’t forget to check out the video tutorial for a more hands-on guide.
Found this article helpful? Share it with others who may need to delete their Facebook Business Manager too! For more Facebook and business management tips, subscribe to our newsletter or follow us on social media.