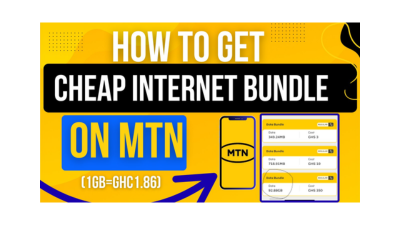
How to Appeal and Reinstate a Suspended Google Business Profile [Step-by-Step Guide]

If you’ve logged into your Google Business Profile and seen the dreaded message:“Your business is not visible to customers. Your access has been suspended because this profile doesn’t follow the guidelines,” — don’t panic. In this post, I’ll walk you through exactly how to appeal a Google Business Profile suspension and get your listing reinstated. This guide is especially helpful if your account was suspended because you had multiple profiles for the same business, which goes against Google’s policies. Let’s dive in. Step 1: Understand Why Your Profile Was Suspended Google may suspend a business profile if: Before filing an appeal, clean up your account. Step 2: Delete Duplicate or Unused Business Listings Go into your Google Business dashboard and delete all profiles that are not in use or are duplicates. Here’s how: Note: When you remove a business, some of the information (like name or address) might still appear on Google Maps for a while. But removing it signals to Google that you’re managing your business listings correctly. Step 3: Gather Necessary Documents Before you file your reinstatement request, have your documents ready: These documents prove to Google that your business is legit. Step 4: Submit the Reinstatement Request Now it’s time to appeal. How to find your Business Profile ID: Paste that ID into the form. Final Tips: Conclusion Having your Google Business Profile suspended can be frustrating, especially when your visibility and leads depend on it. But with the right steps — cleaning up duplicates, complying with guidelines, and submitting a solid appeal — you can recover your listing and get back in front of your customers. Reach out to us directly through WhatsApp or Telegram or book a Zoom meeting with us via our website. If this helped you, drop a comment on my YouTube video or share it with someone dealing with a suspended profile. Don’t forget to check out the video tutorial for a more hands-on guide.Found this article helpful? Share it with others who may need to delete their Facebook Business Manager too! For more Facebook and business management tips, subscribe to our newsletter or follow us on social media.

How to Appeal and Reinstate a Suspended Google Business Profile [Step-by-Step Guide] Read More »

How to Change Your Facebook Page Name Using the Mobile App

Follow these steps to change your Facebook Page name: Open the Facebook App: Launch the Facebook app on your mobile device. Access Your Pages: Tap on your profile picture at the top right corner. Then, tap on the small arrow below the “+” icon to view all your Pages. Select the Desired Page: Choose the Page you wish to rename. Navigate to Settings: Once on your Page, tap your profile picture again at the top right corner. Scroll down and select Settings & Privacy, then tap on Settings. Access Page Setup: Scroll down to find Page Setup and tap on it. Edit Page Name: Within the Page Setup, tap on Name. If you haven’t changed your Page name in the last 60 days, you’ll be able to edit it here. Submit the Change: After entering the new name, tap on Review Change, confirm your decision, and submit. Facebook will process your request, and the name change should take effect shortly. If you need more help, reach out to us directly through WhatsApp or Telegram or book a Zoom meeting with us via our website. Don’t forget to check out the video tutorial for a more hands-on guide.Found this article helpful? Share it with others who may need to delete their Facebook Business Manager too! For more Facebook and business management tips, subscribe to our newsletter or follow us on social media.

How to Change Your Facebook Page Name Using the Mobile App Read More »

How to Add an Admin to Your Facebook Page (Step-by-Step Guide for 2025)

Are you trying to add someone as an admin to your Facebook page but can’t seem to figure it out? Whether you’re using an Android or an iPhone, this quick guide will walk you through the exact steps to give someone admin access to your Facebook page. Let’s get into it. Step 1: Open Your Facebook Profile Step 2: Switch to Your Page Step 3: Access Page Settings Step 4: Navigate to Page Access Step 5: Add the New Admin Step 6: Confirm Access And that’s it! You’ve successfully added an admin to your Facebook page. Final Tip If you run into any issues or something doesn’t look the same on your app, feel free to leave a comment below. I’ll be happy to help you out! If you need more help, reach out to us directly through WhatsApp or Telegram or book a Zoom meeting with us via our website Thanks for reading — see you in the next tutorial! Don’t forget to check out the video tutorial for a more hands-on guide.Found this article helpful? Share it with others who may need to delete their Facebook Business Manager too! For more Facebook and business management tips, subscribe to our newsletter or follow us on social media.

How to Add an Admin to Your Facebook Page (Step-by-Step Guide for 2025) Read More »

How to Verify Your Payment Method on Facebook Ads

If you’re trying to add a payment method to your Facebook ad account and suddenly see something like “Verify card” or “Some payment methods aren’t verified”, don’t panic — you’re not alone. This is Facebook’s way of making sure that you, the owner of the card, are actually authorizing it. In this blog post, I’ll walk you through exactly how to verify your debit or credit card when this issue pops up — using real examples and step-by-step instructions. Why Is Facebook Asking You to Verify Your Card? When Facebook detects unusual activity or if it’s the first time you’re using a card, it wants to make sure the payment method is secure. You may see a message like: “We saw some unusual activity on your payment method. To keep your account safe, verify all of your payment methods.” This simply means Facebook wants to verify that you’re the actual owner of the card. Here’s how to do that quickly and easily. Step-by-Step Guide to Verify Your Facebook Payment Method 1. Click on “Verify Card” After you add the card, a prompt will appear asking you to verify the payment method. Click on “Verify” to begin the process. 2. Look for the Code From Facebook Facebook will send a verification code to your bank. You’ll find this code in one of two places: Look for a transaction description from something like Meta Pay or Facebook, and it will include a 4-digit alphanumeric code (e.g., AB12 or 4G7H). Here’s what it usually looks like: MessageDescription: Meta Pay [CODE] FB.ME/CCIEPrepaid Card Alert – XXXX (last 4 digits of your card) The most important part is that 4-digit code. That’s what Facebook needs.

How to Verify Your Payment Method on Facebook Ads Read More »

[]