Step by Step guide on HOW TO DELETE YOUR YOUTUBE CHANNEL
Step 1: Open the YouTube App
First, open your YouTube app on your phone or tablet.
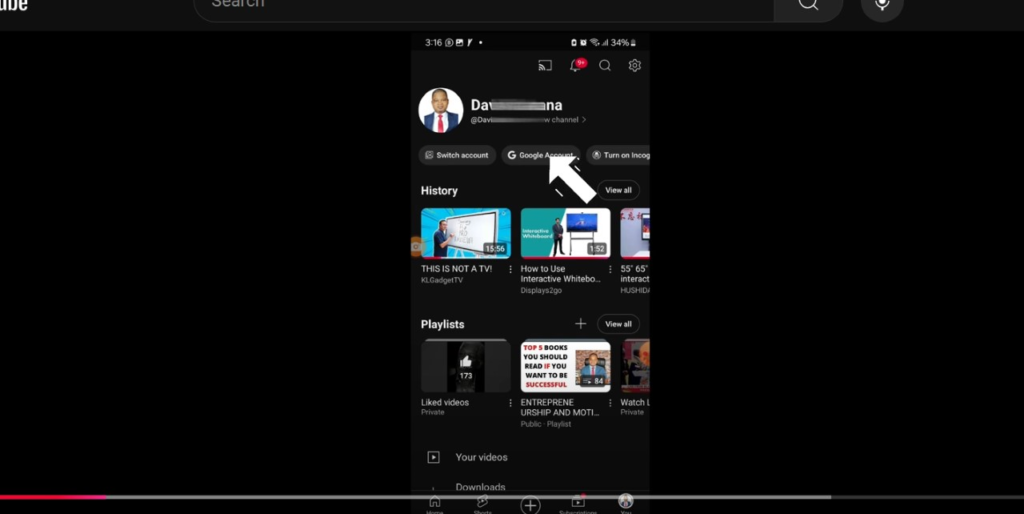
Step 2: Tap on Your Profile Picture
At the top right-hand corner, click on your profile picture. This will open up your YouTube channel settings.
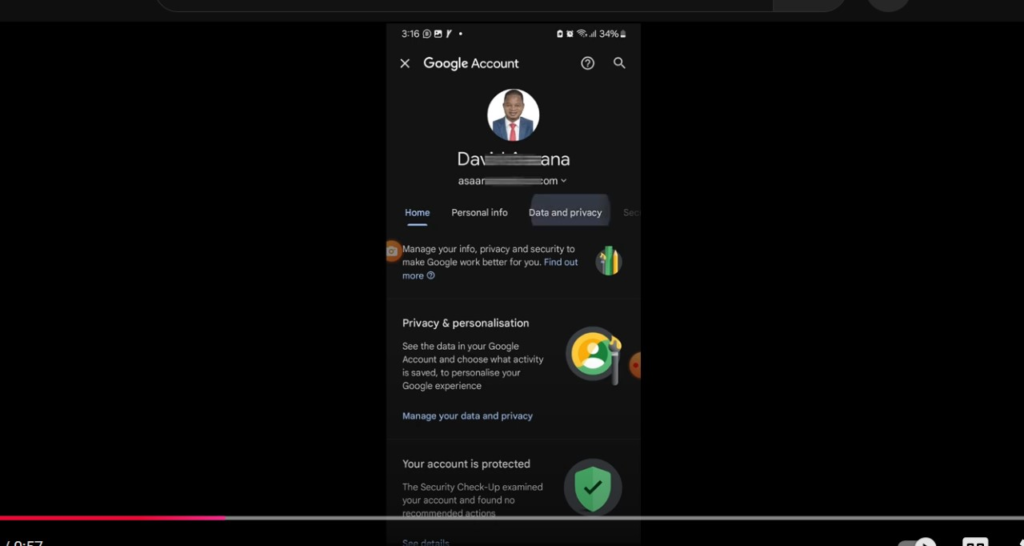
Step 3: Go to Your Google Account
Next, tap on “Google Account.” This will take you directly to your main Google account settings. (You might be asked to log in again, so make sure you have your login details handy.)
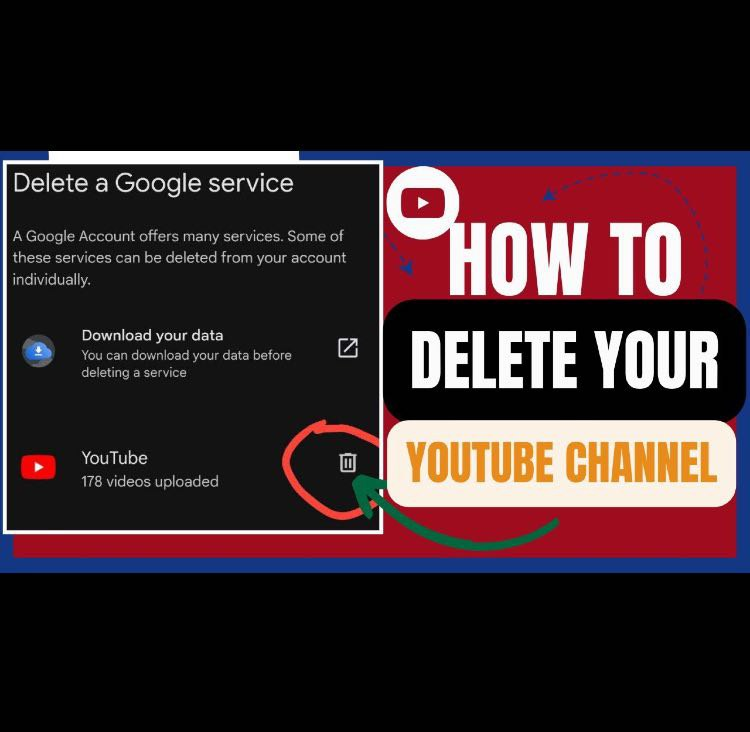
Step 4: Navigate to Data & Privacy
Once you’re inside your Google Account, head over to “Data & Privacy.”
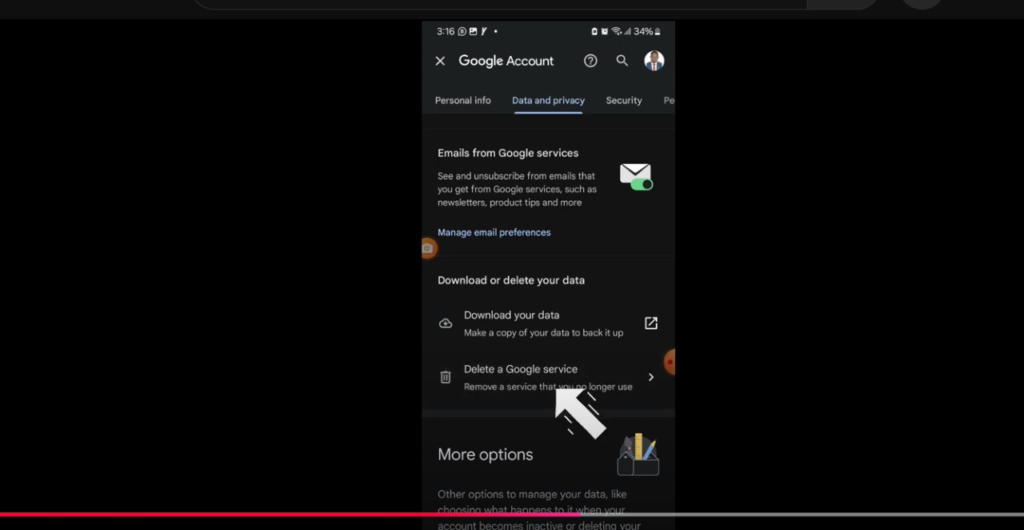
Step 5: Scroll Down to Find “Delete Your Data”
Scroll down until you find a section called “Download or delete your data.”
Below that, you’ll see an option that says “Delete a Google service.” Click on it.
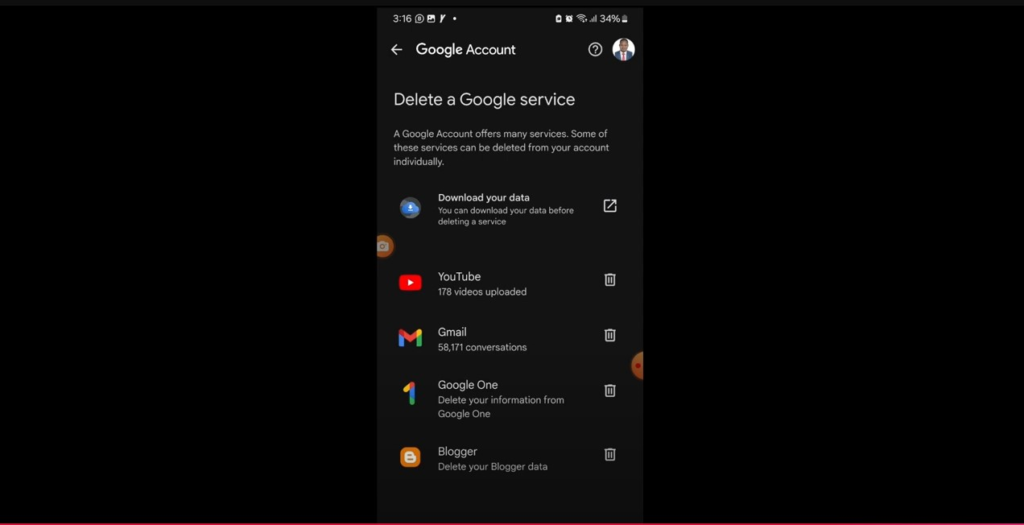
Step 6: Verify Your Identity
Google will ask you to verify your identity at this point just follow the prompts.
Step 7: Delete Your YouTube Channel
After verifying, you’ll see your YouTube channel listed.
Click on the Delete button next to it, confirm your action and that’s it, your YouTube channel will be permanently deleted.
If you need more help, reach out to us directly through WhatsApp or Telegram or book a Zoom meeting with us via our website. Don’t forget to check out the video tutorial for a more hands-on guide.
Found this article helpful? Share it with others who may need to delete their YouTube channel too! For more Facebook and business management tips, subscribe to our newsletter or follow us on social media.